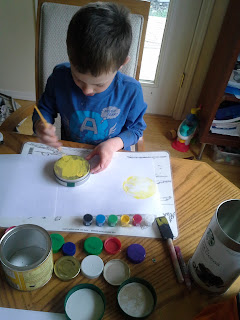
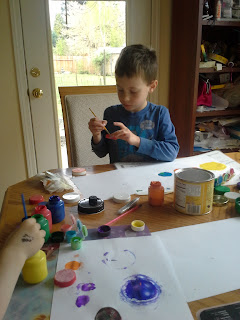
This month my kids and I have been doing activities and crafts that center around Earth day for the month of April. The first of these (and my favorite) was using container lids left over and saved from different things, like milk jugs, to stamp the planets of the solar system. We took several different sized lids and set them out with paints and brushes and two pieces of paper tapped together. We painted the flat side of the lids and stamped the sun and planets in order (my six year old stuck to that plan, my three year old just stamped wherever).
We used a picture of the solar system for guidance and my son labeled the planets. We also read a book called, If You Decide To Go To The Moon by Faith McNulty, which shows a kid preparing for a trip to the moon in a rocket. He gets supplies and games and during the trip talks about being lonely. He gets out on the moon and walks around in his space suit. He discovers that the moon is lacking a lot of the lovely things that the Earth has. On his way home he realizes how special the Earth is because it is the only place with the ability to have life which creates so much beauty and so we really need to protect the Earth.
This was a super easy project that we put together last minute but is great for science, art, motor skills, and writing (if you label planets).
Wednesday, April 24, 2013
Wednesday, April 10, 2013
Marbled Paper Art
I have to confess right from the start, this craft was not mine in the making, but it was so much fun that I had to share it with everyone.
My Grandparents were visiting for a few weeks in March and my Grandma brought along some craft supplies and a project idea that she was just so excited to have everyone do. She set up by putting down a disposable table cloth a tin baking dish slightly larger than 8 by 10 and about 4 inches deep, cans of shaving cream, two boxes of food coloring, stir sticks, card stock paper cut to maybe 7 by 9 inches pieces, and a squeegee.
She had us fill the tin with a bunch of shaving cream and then flatten it out using the squeegee (or hands and by the way super flat is not that important here).
Next lay your paper down flat into the shaving cream and rub the back so that the front comes into complete contact with the shaving cream. Then pull it straight up and lay it on the table cloth.
Grab the squeegee and use it to carefully wipe away the foam.
Then set the paper out to dry and repeat as much as you want using the same shaving cream and just adding new colors or with all new shaving cream.
And Grandma (Great Grandma to some at the house) gets to start hers finally:
Super fun, good sensory play, color theory/naming/mixing, art project that can later be a writing project, because now we have lots of pretty paper to send letters with. :)
My Grandparents were visiting for a few weeks in March and my Grandma brought along some craft supplies and a project idea that she was just so excited to have everyone do. She set up by putting down a disposable table cloth a tin baking dish slightly larger than 8 by 10 and about 4 inches deep, cans of shaving cream, two boxes of food coloring, stir sticks, card stock paper cut to maybe 7 by 9 inches pieces, and a squeegee.
She had us fill the tin with a bunch of shaving cream and then flatten it out using the squeegee (or hands and by the way super flat is not that important here).
Next choose a few colors of food coloring and place a few drops around on the shaving cream. You want some space between the drops and you want it to span the entire pan.
Next take the stir stick and place in in the shaving cream and move it through the drops of food coloring to make a design, any design will do. Next lay your paper down flat into the shaving cream and rub the back so that the front comes into complete contact with the shaving cream. Then pull it straight up and lay it on the table cloth.
Grab the squeegee and use it to carefully wipe away the foam.
Then set the paper out to dry and repeat as much as you want using the same shaving cream and just adding new colors or with all new shaving cream.
And Grandma (Great Grandma to some at the house) gets to start hers finally:
Super fun, good sensory play, color theory/naming/mixing, art project that can later be a writing project, because now we have lots of pretty paper to send letters with. :)
Tuesday, April 2, 2013
Amazing Vegan and Paleo Chocolate Cupcakes
I recently found a recipe for a muffin that is really moist and incredibly healthy. I decided that there must be a way to change that recipe to make a healthy cupcake that would accommodate our recent wheat and dairy allergies. I set out to create a chocolate cupcake with a chocolate frosting. I used the recipe from the chocolate tart I made recently to make the frosting and then whipped it.
A recap of that recipe:
Chocolate Frosting
1 cup Coconut Oil-melted1 cup chocolate powder
1/2 cup maple syrup
1/2 teaspoon vanilla extract
Stir them together and refrigerate until solid. Put into a mixer and whip until creamy leave at room temperature.
The Cupcakes were a bit more of an adventure because when I decided to make them the first time I was missing a banana and had to use pumpkin puree instead. I decided to add a few dates and a bit of maple syrup to compensate and they were really good. They have a bit less of a banana flavor than the original muffin recipe but still do taste like banana a bit. They are very healthy and contain no grains, dairy, or eggs.
Chocolate Cupcakes-Vegan & Paleo
6 Medjool Dates in a liquid measuring cup then fill with simmering water up to the 1/4 cup mark.
1 Tablespoon Maple syrup added to the dates.
2 Tablespoons ground Flax seed in 6 Tablespoons hot water.
1/3 cup pumpkin puree
1/4 cup chocolate baking powder
1 Tablespoon Vanilla Extract
2 Bananas
1 cup almond butter (or other nut butter)
1 Teaspoon baking soda
1 Teaspoon cider vinegar
Preheat the oven to 350 degrees. Line 12 muffin tins (I highly recommend lining them not just greasing them)
Add the first 8 ingredients to a container to use an immersian blender or to a food processor. Blend well until completely smooth. Add in the cider vinegar and blend to completely mix. Spoon into muffin tin to fill muffin cups about 2/3 of the way. Bake in the preheated oven for 22 minutes. If you stick a toothpick in it will come out with a little damp chocolate on the bottom.
Allow the cupcakes to cool completely, and I really mean completely I tried it before they were all the way cool and it didn't work, and frost with the frosting. ENJOY!
 |
| My 6 year old son wanted to take a picture of me making the cupcakes. :) |
Subscribe to:
Comments (Atom)


